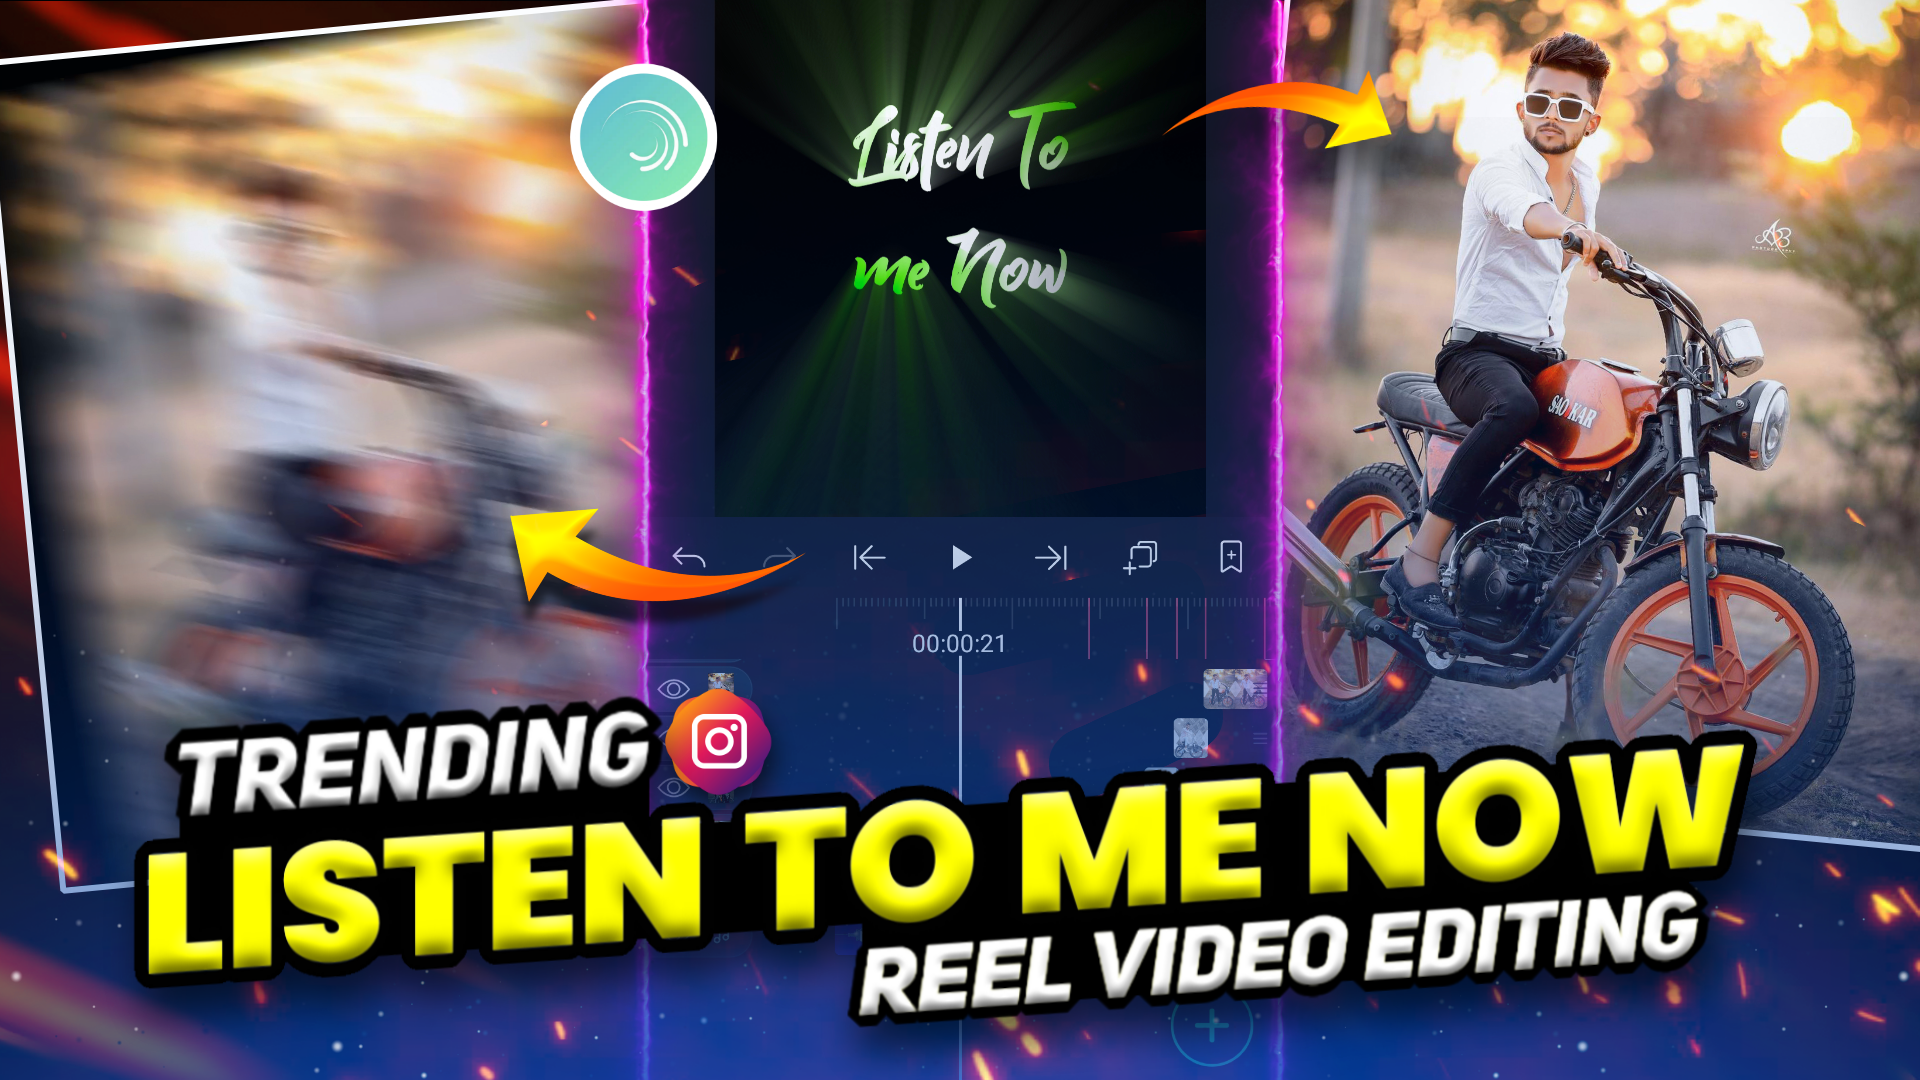
Hello guys I am RC creation and I welcome you all into another interesting video editing tutorial blog post. In this blog post we will discuss how you can create a “listen to me now” song reels video on your Android phone. If you are using Instagram then I am sure that you will definitely hear the “listen to me now” song. Because this song is trending on Instagram reels. So without wasting any time let’s dive into the blog.

If you want to look at the preview of what we are going to create then you can watch it on my Instagram profile. If you’re not following me on Instagram then you can reach my Instagram ID by just clicking the below Instagram button.
STEP 1
The video editing is very simple and you can also edit by yourself but for that make sure that you will read this blog till the end. So firstly we need a video editing application to edit our video and for that alight motion is the perfect application. If you don’t have this application on your phone then you can simply download it by using the downloadable link given below.
STEP 2
Now import the below beat mark project into your alight motion application. To import the beat mark project simply click on the button available below. This button redirects you to another new tab and opens the project into your alight motion app. So from there you can easily import this beat mark project into your app.
STEP 3
In this beat mark project I have already marked the beats of our MP3 song for you. Basically importing beat mark projects you can skip the beat marking process. If you still want to mark the beats of an MP3 song by yourself. Then I have provided you with the download link of the MP3 song below. You can download and add it to your project and then you can mark the beats manually.
STEP 4
Open the beat mark project and listen to the MP3 song present in the project. After hearing this song you will get an idea about the lyrics present in this starting phase of our song. So to justify that lyrics you need to add a text to your project. So to add a text click on the plus icon available on the bottom right corner and then select add text option. Now write the lyrics which are present in the song.
STEP 5
After adding the lyrics text you need to add a text animation to this text. You can create your own text animations or you can also use the animations that I have made. To use my animations you need to import the shake effect project first. You can import the shake effect project by just clicking the button given below. In this shake effect project I have provided you with all the animations and shakes which we need to create “listen to me now” song reels video.
STEP 6
You need the latest version of alight motion to import any project into your app. So if you are using an older version of alight motion application then you might be unable to import the above shake effect project. In that case you can import this project by using the XML files. You just need to download the XML file which I have provided you below. Then share this file to alight motion app. Your project gets easily imported.
STEP 7
Now come to the position of the first red line and add those images on which you are going to create this “listen to me now” song reels video. To add those images click on the plus icon and select image and video option. Then add those images into your project. If you need the images that I have used in my video. Then please join our Telegram channel by using the link below. You will get all the images in full HD quality on our Telegram channel.
STEP 8
Apply the shake effect to all added images. Shake effect provides attractiveness to our “listen to me now” song status video. Here also you can create your own shake effects or you can use the shake effects which I have provided you in the earlier step. To use my effects just copy it from the shake effect project and apply it to your main project. I have provided you with the four shake effects so it completely depends on your choice of which effect you like the most.
STEP 9
After following all the steps mentioned above your video is ready to export. To export the video just click the share button and save your video. If you face any problems regarding this blog post, then you can refer to my youtube video. Link is given below.
STEP 10
Decode the group layer and click on the text image layer. Now click on the three lines present on the left hand side and then select the replace option. Now replace the default image text with the text image which we have created in the pixel lab application. Once you replace the image you don’t need to do any functions. Because all the settings are done already for you.
STEP 11
Now move to the image layer and select it. Here again click on the three lines available on the left hand side and then again select the replace option. Now choose your background removed image. We have already done the background removing task in the earliest steps. If your image is not perfectly adjusted then use the position option to adjust it properly in frame.
If you have any queries about today’s blog then feel free to share with us by using the comment box. We will try to solve your queries as early as possible. Thank you for your valuable time.