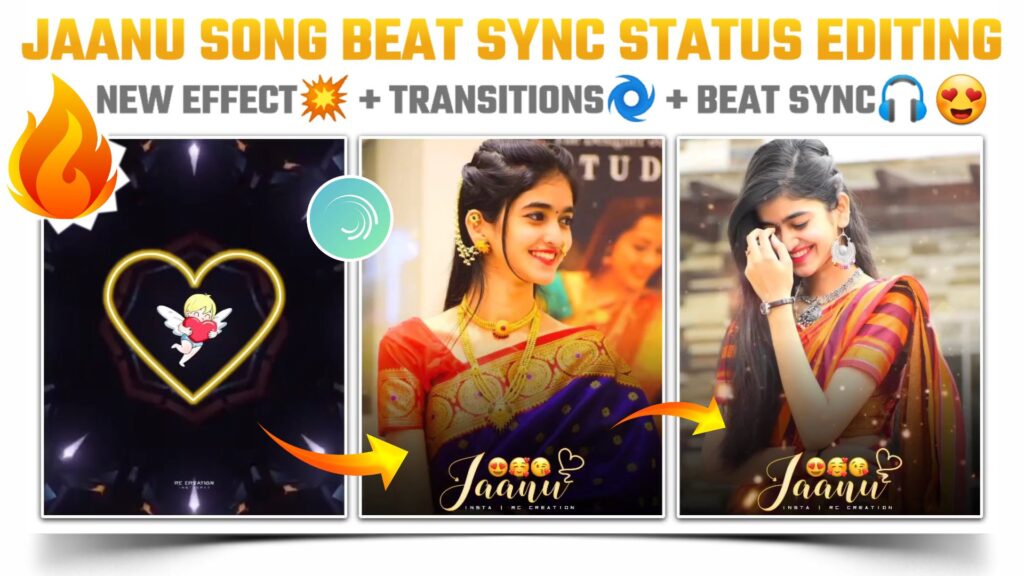
Hello guys, how are you? First of all sorry because I have not posted a single post for the last two days. The reason was I am not feeling well so that’s why I have not posted any posts. Let it be in this blog we are going to create a jaanu song beat sync status video. Making a beat sync status video is very easy and you too can make it easily. You just need to follow the below given step.

STEP 1
To create the beat sync status video you need help from an application. The name of application is alight motion. You can download this application from the download link below. You have to use the latest version of alight motion to import the for the project which I am going to provide you in upcoming blogs. 3.7.1 is the latest version of alight motion.
STEP 2
In the 2nd step you need to mark the beat present in our MP3 song. First of all, download the MP3 song from the download link below. Then add this MP3 song using the audio option.
STEP 3
If you are facing trouble while marking the beat of our MP3 song and if you want to skip this beat marking step. Then you can import my beat mark project by just clicking the button below. In this beat mark project I have already marked the beat of our song for you. Friends, you need the latest version of alight motion to import this beat mark project.
(Note 📝 : PRESET link only import on 3.4.3 version of alight motion)
STEP 4
Open the beat mark project and add a new light overlay video. You can add this new light overlay video with the help of image and video options. After adding the new light overlay video, adjust it properly by cutting the extra part of this video from the first red light. You can download this new light overlay video from the download link below.
STEP 5
Now click on the plus icon present at the bottom and add a heart shape. Click on the border and Shadow option and turn on the stroke. Apply white colour to the stroke. Now choose the colour and feel option and hide the original colour of shape.
STEP 6
Apply the drawing effect to added heart shape. You can create your own effects or if you don’t know how to create effects. Then you can use the effect which I already made. To apply that effect you need to import another project whose name is shake effect project. Import the project from below link and apply the effects to heart shape.
(Note 📝 : PRESET link only import on 3.4.3 version of alight motion)
If you are not able to import this project in your alight motion app. Then you are using an older version of the application. To import this project you can change your version by updating the application or or you can use the XML file to import this shake project. Download link of XML file is given below.
(Note📝 : XML file can only be import on 3.3.5 – 3.3.0 – 3.1.4 & 3.7.1 version of alight motion)
STEP 7
After applying the shake effect to heart shape. You need to add a love cupid PNG. You can add this PNG by using image and video options. Set it to the centre and adjust the size according to heart shape. You can download this love cupid PNG by just clicking the button below.
STEP 8
Come on the position of the first red line and start adding those images on which you are going to create this beat sync status video. You can add those images by smashing the image and video option. If you need the images that I have used in my beat sync status video full stop then please join our Telegram channel. On our Telegram channel you will get all the images in full HD quality.
STEP 9
After adding and adjusting all the added images between two Red Line. Now you need to apply the shake effect to each and every added image. You can use the above shake project to apply the shake to added images. You also need to apply transition effects to the added images. For that you can import the transition pack by clicking the button below.
Friends if this transition pack does not work for you. Then please try to import the second number transition pack which I have given below. After importing the transition packs, open it, copy effects and apply it to the main project.
STEP 10
Again come on the position of first Red Line and add a glass particle overlay video here. Add this glass particle overlay video by clicking image and video option. Click on blending and opacity option and apply screen effect to glass particle overlay video. Download link of Glass particle overlay video is given below.
STEP 11
Now add black Shadow PNG from the position of the first red line. To add the black Shadow PNG first download it from the link below.
STEP 12
To finish the editing of our beat sync video at the Janu name text PNG. You can add this text PNG by using image and video options. Download link of this Janu text PNG is given below.
STEP 13
After following all the steps mentioned above your video is ready to export. To export the video just click the share button and save your video. If you face any problems regarding this video, then you can refer to my youtube video. Link is given below.
If you have any queries about today’s blog then feel free to share with us by using the comment box. We will try to solve your queries as early as possible. Thank you for your valuable time😊


1 Comment
Gaytri · May 15, 2021 at 5:08 am
Super Dada tu khup chan editing kaarte ani bilkul sutsutit sangte