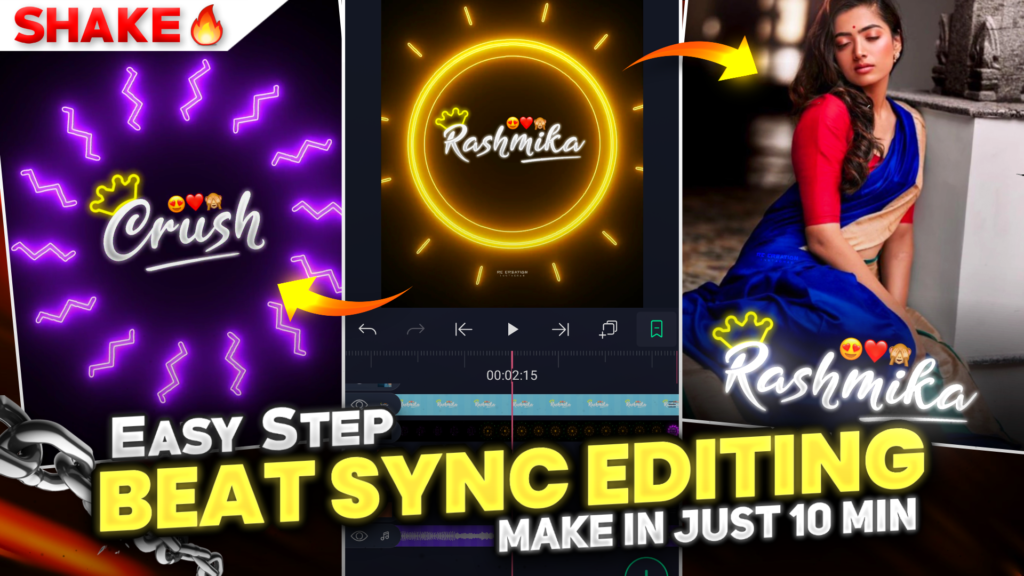
Do you guys like beat sync videos? If your answer is yes then let’s try to make beat sync videos this time. Sounds good! Hello guys, my name is RC creation and I welcome you all into another amazing blog post. In this blog post we are going to see how you can create a beat sync status video by using your own photos. So make sure that you will be with us till the end of this blog to understand complete editing of beat sync video. So let’s get started.

STEP 1
Let first talk about the editing application which we need to create a beat sync status video. The requirements of beat sync status video is normal but the exceptional requirement is you need to choose the application which has lots of shake effects. Considering these requirements, alight motion is the best of other applications. If you hear this name earlier then it is great otherwise you can download this application by just clicking the below button.
STEP 2
Open the alight motion application and click on the plus icon that you will get on the bottom side. You will see the project setting in front of you. Select 4:5 ratio, 1080p resolution and black background, then click on the create project option. Now add a MP3 song on which you are going to create this beat sync status video. To add the MP3 song click on the plus icon and then select the audio option. By this way you can easily add the MP3 song into your project. Download link for the MP3 song is available below.
STEP 3
Listen carefully to the MP3 song which you have just added in the above step. Because you need to mark the beats present in this MP3 song. Marking the beats helps us to make perfect beat sync videos. If you don’t know how to mark beats of an MP3 song. Then you can watch my “How to mark the beat of any song” video on YouTube. I will provide you with the link to that video below.
STEP 4
If you are facing some problems while marking the beats of an MP3 song or you are unable to mark the beats present in the MP3 song. Then you can simply import the below beat mark project. In this beat mark project I have already marked the beats for you. So after importing this project you don’t need to mark the beats of an MP3 song. You need the latest version of alight motion app to import any project. So remember to update your App (If it is not updated) before importing any projects.
STEP 5
Now add a neon overlay video into your project. To add a neon overlay video, click on the plus icon and then select image and video option. Choose the folder in which your neon overlay video is present and add it to your project. After adding the Neon overlay video, cut the extra part of this overlay video from the position of the first Red Line. You can download this neon overlay video from the downloadable link given below.
STEP 6
Add your name text PNG over this neon overlay video. I am going to add a Rashmika name text PNG here. To add text PNG follows the same procedure that we have followed while adding the neon overlay video. After adding the text PNG click on the move & transfer option and resize and set it to the centre. I have provided you with the download link of Rashmika name text PNG below. So you can download that text PNG from that link if you need it.
STEP 7
In case you are making this video for any special person and you need another text PNG rather than the rashmika. Then you can use the crush name text png too. I have already made this text PNG for you. You can download the crush name text PNG by just clicking the button available below.
STEP 8
To create the difference between our beat sync video and normal beat sync video add a Rashmika video clip from the position of the first red line. To add a video clip choose the image and video option and select that video clip. After adding this video clip, cut the extra part of this video from the position of the second red line. I have provided you with the download link of this video clip below.
STEP 9
Now add those photos on which you are going to create this beat sync status video. Again to add these photos choose the image and video option and add your photos. After adding the photos make sure that it will present in the full screen, if it is not then you need to adjust it to the full screen by using move and transfer option. If you need the photos that I have used in my video. Then please join our Telegram channel by using the link given below.
STEP 10
You need to apply the shake effect to all the photos that you have added in the above step. You can create your own shake effect or if you want to use mine. Then import the below shake effect project. In this shake effect project I have provided you with all the effects which we need to create beat sync status video. You can easily import this shake effect project by clicking the below button.
STEP 11
If you’re getting errors while importing the shake effect project. Then it might be possible that you are using an older version of alight motion app. As I earlier said, you can’t import projects without the latest version of alight motion app. But if you still want to import the project then you need to take the help of an XML file. Download the XML file by using the link below and share it to alight motion app to import the shake effect project.
STEP 12
Apply the shake effect to all the photos by just copying it from the shake effect project. It will be a very easy task for you. Now come to the position of the second red line and add a black colour Shadow PNG here. To do this click on the plus icon and then select the image and video option. You can easily add this black colour Shadow PNG by this way. Download link of black colour Shadow PNG is available below.
STEP 13
At the end part of this beat sync status video. Add a crush name or Rashmika name text PNG over the black colour Shadow PNG that we have just added in the above step. Follow the same step which we have done while adding the black colour Shadow PNG. I have already provided the download link of both PNG in the above steps.
STEP 14
After following all the steps mentioned above your video is ready to export. To export the video just click the share button and save your video. If you face any problems regarding this blog post, then you can refer to my youtube video. Link is given below.
If you have any queries about today’s blog then feel free to share with us by using the comment box. We will try to solve your queries as early as possible. Thank you for your valuable time.


1 Comment
Karan charde · September 27, 2021 at 7:11 am
Editor